Showing posts with label landscape tip. Show all posts

Saturday, April 22, 2017

Flagstone Stepping Stones

A few random pieces of flagstone can make a nice stepping stone path through your lawn. Situate your flagstone to that the top is just above the soil line and lower than the level where a mower might make contact. Twist and turn the stones into a pattern that doesn't seem too regimented and make the distance between the stone comfortable for folks to walk across.
And, as so often is the case, it is what you don't see that makes what you do see look good or not so good. The base soil beneath these flagstone pieces should be excavated deeply enough  so that the soil can be tamped and  then leveled with a paver base gravel or sand that the flagstone will actually sit on. Also, be sure your flagstone pieces are not too thin. I prefer at least 1" thick flagstone and if the pieces I'm using are particularly large, I'll try to select pieces that are 1.5"+ thick. Some of the larger flagstone pieces in this photo are close to 3.5' x 2.5' (wide x long).


Photo: Step stones I installed about 1 year ago.

Tuesday, January 21, 2014

Winter Watering Can Help Your Landscape Plants Thrive

Tonight, the low temperature will hover in the upper teens. On the surface, that doesn't seem to pose a detrimental threat to most of our plants we have growing in the Central Alabama, USDA zone 7B. Concerns, however, arise from the fact that this approaching cold front is not preceded by a rain event. A couple of weeks ago our area had temps in the low teens to upper single digits, but, as typically is the case, there was a significant rainfall that occurred just before the front moved in. I'm of the opinion that our plants may have been in better shape heading into that colder weather than we are for this one simply because we haven't had rainfall in our area for a week or more. In short, plants that have had the benefit of rainfall or watering will hold up better against the cold than plants that are dry. The roots, stems and leaves of dry plants are more likely to suffer from the dessication that bitter cold can create than those that are hydrated. It's worth the time and effort....ummm, and the discomfort, to be sure your plants are not dry going into a extreme cold event. Believe me, I know, as I was hand watering this evening in freezing weather with 40 mph wind gusts. Certainly, most plants in our area won't perish with temps only dipping into the high teens, but there are some specific categories of plants that would benefit: 1. Plantings that have been in the ground less than a year. 2. Plants with a zone hardiness rating at or below what your zone is for your specific area. 3. Herbaceous plants such as pansies, evergreen ferns, etc.

Saturday, March 5, 2011

Kitchen Window Fun!


One reason I enjoy this time of the year is because that call to do a little fruit tree pruning will typically come in. What's fun about pruning fruit trees? Well, you've got a point there, but the side benefit is that you've got clippings that can be brought indoors to eventually bloom into quite a nice bouquet. Fruit trees, from my experience, are best, but you might have success with other flowering plants such as flowering quince, forsythia, and jasmine. Take a few stems as the flower buds appear to be beginning to swell and put them in a vase of water. Sit the vase in a window and enjoy! Experiment with different plants (what about azaleas or roses) and let me know if you're having success!


Photo Right: This grouping of peach tree stems didn't show any color at all a week ago.

Monday, April 5, 2010

Early Spring watering is just as important as "keeping your plants alive" watering during the Summer.

It is early May. Or, early Spring; although, for this year, it seems as though we might have skipped Spring and sauntered into Summer a couple months early. It is important during early Spring, regardless of whether it feels like Spring or not, to monitor the rainfall that occurs. It is not uncommon to experience extended drought during late March or all of April. This time of the year is when our deciduous plants and evergreen plants take on a flush of new growth. That flush of growth results in an accelerated uptake of water by your plants and if the soil is dry, that growth will not be as full and vibrant as they might otherwise have been under normal rainfall conditions. Early Spring is also the time of the year we likely have pansies looking for one last hurrah. Insuring they are hydrated will make all the difference in the world. Of course, new plantings will not survive just because it is Spring. Watering is vital for all new, Spring plantings when we are not getting a thorough rainfall every 3 or 4 days. This Spring, especially the last 2 1/2 weeks (as well as the forecast for the next 10 days), is a perfect example of the "dry Spring" phenomenon. If you have an automatic sprinkler system, I'd at least set it to water once a week for as long as the dry weather continues. There are instances where water must be delivered to plants more often (new sod, for instance), but generally, you should be aware of the weather even though it isn't Summer, and respond accordingly.
Happy Spring and happy gardening!

Tuesday, October 27, 2009

I'm a pushover for Fall planting (and football).

Fall (Autumn or football season will also do) has been my favorite time of year for as long as I can remember. The crispness of the air, Auburn and Alabama beginning the season with renewed optimism, tree leaves turning yellow, red, and orange; it's all good, to me. Another big plus is that it's planting time!

PHOTO: My apologies to Tide fans. You guys have a fantastic team!

Nurserymen and landscape professionals have been extolling the virtues of fall planting for as long as I can remember. The reasons are convincing. Here are two important ones:

1. Root Growth. One of the things that will enhance survivability of your ornamental plantings is root growth. A balled and burlap plant or container plant do so much better when the roots get out and grow beyond the confines of their root ball as they were sitting in the nursery. Mark Longstroth, of the Michigan State Extension Service points out that root growth is most significant during the spring and fall. Sure enough, planting in the fall allows your plants to go through two seasons of root growth before summer heat takes the reigns.


2. Transpiration. Transpiration is defined as such: "to lose water vapor from a plant's surface, especially through minute surface pores, the stomata". When your plants look wilted or dried out in the summer, you can likely assume that transpiration is taking place and there is not enough rainfall or irrigation to compensate. Heat and lack of water are the main culprits that contribute to problems occurring due to plants transpiring. An ecologically friendly way to overcome plants stressing in the summer is to plant when transpiration is not as much of a factor. Planting in the fall will give your plants time to establish themselves before big-time transpiration kicks in.

Some planting techniques will also help to assist plants in their bid to compensate for transpiration and to increase root growth. Loosening the roots of a root bound plant will encourage new roots to emerge. And planting shallow, as opposed to deep, will create an root friendly environment for your new plantings.

Sunday, August 2, 2009

Spacing Indica Azaleas


PHOTO: G.G. Gerbing Azalea

The old tried and true Indica azalea is, for much of the South East (zone 7b, 8, and 9), especially from Birmingham to Mobile here in Alabama, a durable landscape plant that doesn’t seem to be losing much of its popularity as newly developed, heavily marketed plants find their way into the local nurseries. Indicas, with their large, showy blooms that appear in mid spring, are not only a popular natural area plant, but also finding a home as a mid sized foundation plant. Why not! They are evergreen, offer pleasant looking foliage, and if pruned properly, stay full of leaves from the ground up. Add to that the ability to grow in shade or quite sunny conditions, and you’ve got a real winner.

There are an array of Indica varieties to choose from. My experience is that some Indica azaleas, like Formosa and Pride of Mobile, are probably more suited to South Alabama than other varieties. The two Indica azaleas that I have used extensively and like the best are G.G.Gerbing (white) and George Tabor (shade of white, pink and lavender).

When laying out Indica azaleas to install, spacing is important. Decide how you want a planting to look in, say five years. A grouping of three gallon Indica Azalea, for instance, might look very satisfying with a two and a half to three foot spacing (from the center of the plant to the center of the next plant), but in five years, you will find it difficult to even walk between your plants to prune them. If a solid, hedge-like mass of azalea is what you want, and the challenge of pruning a closely spaced planting doesn’t scare you (it does me), then the decision to create a more mature looking landscape, initially, might have been worth it.


PHOTO: George Tabor Azalea

A four and a half to five foot spacing (or even more), on the other hand, can be beneficial in a number of ways. A generous spacing will allow each azalea to grow with good air circulation. This means that the likelihood of your Indicas developing insect or disease problems is lessened. Maintaining a generously spaced grouping of azaleas will be easier, as well. While Indica azaleas can grow to well over ten feet tall and wide, keeping their size to about half of that is quite doable. With five foot or more spacing, your plants can be allowed to grow to a nice five foot tall by five foot wide size without needing drastic pruning to keep them there, and each azalea will have distinct form while the grouping, as a whole, will look full.

Of course, proper spacing is important with all plants. I can’t tell you how many times I’ve been called in to prune an over planted landscape. Some of these landscapes are less than five years old and it is nearly impossible to maintain them because of the improper spacing. There are times when the best option is to cut the plants to the ground and let them come back up as a new looking, bushy plants. This technique will then have to be repeated every few years. As an old fashioned hand pruner, to resort to that breaks my heart, but, I’m sure the landscape looked outstanding for the first couple of years.

Wednesday, March 25, 2009

Top Ten Crape Myrtle No-No's


Crape myrtles are popular in our region of the mid to lower South and rightfully so. Unlike the in vogue nature of plants such as Bradford pear and Leyland cypress, crape myrtles actually have positive ornamental characteristics that far outweigh any negatives associated with this Southern horticultural heavyweight. Among the characteristics that have many wanting at least one crape myrtle in their yard are the distinctively showy blooms, the exfoliating bark that ultimately reveal an often colorful muscular trunk, and the superb fall foliage that can range from delicate yellows to intense reds. When it comes to negatives, the crepe myrtle itself can usually be held without blame. Many times, it is the owner of the crape myrtle that has committed the no-no, and so, without delay, here is my list of the Top Ten Crape Myrtle No-No's:

PHOTO: Nachez crape myrtle - possibly the most used and well-known of all crape myrtle varieties.


10. Selecting a plant that requires massive pruning to fit into it's space - Today's crape myrtle is much different than those that our parents enjoyed. We have a multitude of varieties available to us with enhanced cold tolerance, improved insect and disease resistance, and most importantly, we have crape myrtle varieties that, at maturity, grow as small as one foot tall, to giants that can reach 40' tall. With all these choices, it is upon the designer/installer to chose the appropriate plant. For instance, if you have a space where you want a white crape myrtle that grows to about 10' tall, then you should be looking for a semi-dwarf variety. Named crape myrtles usually are tagged with information that tells you how large they are going to grow or you can do a little research online and find out what varieties fit the parameters you've set up. When looking for a white crape myrtle that grows 10' tall at maturity, you don't want to buy a Nachez, for instance. Nachez crape myrtles will grow over 30' tall and will quickly become too large for your space. The better choice would be one of the white semi-dwarf crape myrtles, like Acoma.
9. Buying a plant labeled red or white or pink or purple - I've seen this from time to time. A crape myrtle simply tagged, "pink". This is a sure sign that you are probably not purchasing an improved variety and it is your guess as well as anyone else's as to how large it's going to grow. Your best bet is to steer clear and seek out a named variety.

8. Not buying a plant that is insect or disease resistant - Insect and disease has, in the past, been quite the bugaboo for crape myrtles. Aphids and powdery mildew were among the most bothersome agents of doom when it came to crape myrtle decline. Now, with improved varieties available to the public, you can pretty much purchase crape myrtles secure in the thought that they will grow well and you won't be treating them every growing season. Of course, the disclaimer is: nothing is absolute and sure as I talk about improved insect and disease resistance, there are isolated cases. Crape myrtle lists are out there that will signify certain varieties as being more hardy than others if you really want to cover all your bases.

PHOTO: Tuscarora crape myrtle - Here it is used as a street tree. Tuscarora crape myrtles will grow to 20' tall by 15' wide and have huge flower panicles (12" by 8") that are dark coral pink for about 70 days during the summer. Nachez, Tuscarora, Tonto, Souix and a score of other crape myrtles are from what is referred to as the Indian series. This series of crape myrtles is readily available at reputable nurseries and are highly recommended.


7. Improper spacing - When planting a grouping of crape myrtles, attention should be paid to spacing. One characteristic of crape myrtle that can be enjoyed is the graceful branching habit. A way to diminish this characteristic is to plant too closely together and planting too closely together inhibits air circulation (which is helpful in fending off disease) and makes the landscape appear cluttered. As I've mentioned, every crape myrtle has a mature height it will grow to, but they also have a range that they will grow to in width. For example, Acoma crape myrtles are usually listed as growing to about 8' - 10' high and to about 10' - 12' wide. So, if you are planting a grouping of three Acoma crape myrtles, you probably don't want to plant them closer than 10' or 12' apart.
6. Planting in too much shade - I've seen crepe myrtles growing in too much shade and they always look unhappy (yes, I occasionally think of plants as having human emotions :-)). Now, a crape myrtle will grow nicely in just a little shade, but know that the more shade it is subjected to, the fewer number of blooms you will have, the less foliage you will have during the growing season, and the more the crape myrtle will grow leaning toward the sunlight.
5. Not keeping your crape myrtles pruned up - As you will see when you get to rule No. 1, I am not a big fan of pruning crape myrtles. I do, however, encourage limbing up and the removal of dead and intersecting branches. The limbing up process does not apply so much to the more dwarf and shrub varieties of crape myrtle and much as they do to crape myrtles that you want to look like multi-trunk or single trunk trees. The limbing up procedure is where you take smaller limbs growing out from a main trunk and prune them off flush with the main trunk. These limbs are typically going to be located on the bottom 1/3 of the plant and, when removed, give the crape myrtle more of a tree-form appearance. Also, removing dead limbs and branches that intersect, rubbing against each other, is a way to improve the overall health and attractiveness of the crape myrtle.
4. Underplanting with too much plant - I most definitely encourage underplanting crape myrtles, especially when they are planted in natural areas or as part of a foundation planting. What you want to avoid, though, is underplanting with material that overwhelms the crepe myrtle. For example, large hollies or conifers don't look good under crape myrtles. Try using low growing plant material to plant under a crape myrtle. Ground covers and other low growing plants are great to plant under crape myrtles (Asiatic jasmine, English ivy, Autumn fern, dwarf azalea, etc.).
3. Clashing colors - When it comes to crape myrtles, too much of a good thing isn't necessarily good. Typically, in my landscape designs, I may have a singular crape myrtle plant or perhaps a grouping of several crape myrtles of one variety, but rarely do I incorporate multiple crape myrtle plantings of different varieties. If you have a grouping of red crape myrtles in your yard, for instance, and you insist on going with another grouping of a different color crepe myrtle, you might avoid using purple. More importantly, I would keep in mind the colors in your landscape in relation to when and where your crape myrtle is blooming. For instance, you may not want to plant summer blooming yellow hypericum under your Souix crape myrtle unless you enjoy the interplay between a medium pink and yellow. Opinions about colors in the landscape are of a subjective nature and all I can do is offer my opinion. I lean toward what I'd call "kinder combinations" with white being the great equalizer. I prefer using different shades of pink together or white with just about any other color. I'm OK with magenta combined with pink while I try to stay away from purples with red, lavenders and pinks with yellow, etc.

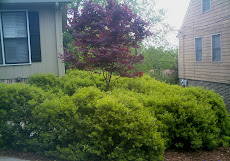
PHOTO: Chickasaw crape myrtle - a dwarf variety. This established plant from an Auburn University research center in about 2' tall.


2. Having a rogue crape myrtle - Seeing a planting of 4 pink crape myrtles and 1 purple one is more of a pet peeve for me than anything and it is often beyond the buyer's control. Sometimes plants simply get tagged incorrectly. With crape myrtles, when you are buying a group of one variety, take the time to examine each plant, even if they are tagged the same. You can sometimes spot a rogue plant by noticing that its habit of growth is different from the others or the leaves seem to be of different size or, if it is fall, that the fall color of one plant is different from the others. Still, if you realize that you've got a wrong colored crape myrtle....please! Replace it!!! (How's that for drama?).
1. Crape Murder - Who ever came up with that saying has given landscape professionals a catch phrase for the ages. And why not? When you top a crape myrtle, you are acknowledging that your crape myrtle was not properly selected or that you are a status quoer! (I just invented a word!!!). If you are a crape murderer, I still love you. I just don't want you within a mile of my yard if you have pruners on your body. :)

Monday, February 9, 2009

Big Stepping Stones

Stepping stones are such a fixture in many landscapes. Here's a few tips to make them work and actually add to the beauty of your little corner of the world.


1. Pick the right size stepping stone, be it real stone or man made. Consider going a little larger than you actually need, as you'll often lose some of your stepping surface if grass, soil or mulch cover some of the stone.


2. Take your time on the installation, being sure to bury the stone at a depth where water will not collect on the surface of the stone and so that a mower can roll easily across the stone if it is place in a turf situation. Also, be careful to set the stone so it doesn’t rock on you when you step on it. This is another reason to use a larger stone, as large stones are less likely to move around on you.


3. Pick out pretty stones for your project. Look at your surroundings and try to imagine how your stepping stones will blend with the rest of your yard. These stones will be around for a long time to come.


PHOTOS: I designed the layout and installed these stepping stones about three years ago in Birmingham, AL.

Tuesday, January 13, 2009

Bundle up and prepare your plants for cold

Happy Chilly New Year!
It appears, as we wrap up our second week of 2009, Old Man Winter is going to pay us an extended visit. Temperature predictions for early Friday morning range from 16 degrees (the Weather Channel) to 10 degrees (James Spann, our local weather guru). Thursday morning won't be much better and factoring in wind chill, it'll be feeling like sub zero weather. But hey, it's winter, right?
But how about our friends, the plants? We can put on a coat or some long johns, but plants can't. They don't have arms and hands.


So, what plants need protecting? According to the USDA, plants with no better than a cold rating of zone 8 need to be protected. Zone 8 plants could sustain damage when true temperatures reach 10 degrees. Some of these plants would be Tea Olive (cold hardiness rating of zone 8), Gardenia (zone 8b, 15 degrees), and Indian Hawthorne (zone 8). When these and other zone 8 and 9 plants are subjected to the kinds of temperatures we may see in the next couple of days, damage may occur. Leaves and stems may die back, root systems may sustain injuries and plants might even die completely.


What can we do to combat extra cold temperatures? Well, there are quite a few things. For one, an extra thick layer of mulch is quite helpful. I like to use pine straw because you can fluff it up adding to the insulating value, but pine bark mulch and even pea gravel are other suitable mulches to help protect your plants with. Another very good protective measure is to cover your entire plant with a sheet or plastic. A cloth sheet is best, but if you do use plastic, be sure to remove it during the day when the sun is out or you could actually harm your plants. Finally, if your plants haven't had the benefit of rain or haven't been watered within the last couple of days, you probably should water them prior to the extreme cold's arrival. A turgid root system is much more likely to survive chilling temperatures than a dry one.

Wednesday, November 5, 2008

When is it a good time to plant shrubs and trees?


This is a question I get asked from time to time and like many in my profession, I have my opinions. The criteria I am going to use for ranking months to plant woody shrubs and trees is survivability. Planting a large tree in scorching July heat, for instance, could be so stressful that a tree could perish with less than optimum care. So here are the rankings, from worst to best:

#11 and #12 - July and August - I wouldn’t suggest planting woody shrubs or trees in these two months. July is the hottest month in Central Alabama with an average high of 91 degrees; however, it can be a wet month, averaging a little over 5” of precipitation a month. August might be a little more tempting of a month due to its closer proximity to fall, but with an average high temperature of 90 degrees and it being the second driest month, with less than 3.5” of rain, on average, it is just as unsafe a month to plant in as July is.

#10 - June - Spring has sprung and summer is gaining momentum. Don’t get fooled by a few pretty days. With average high temps of 88 degrees and an average monthly rainfall of 3.78 inches (third worst month), June offers little upside for planting things like forsythia, maple and other shrubs and trees.


PHOTO: Red Sunset maple

#8 and #9 - May and September - Neither is an awesome month to plant in, yet neither is off limits. If the subsequent care (especially watering) of the plants being considered for installation is going to be good, I will plant them. Both of these months average over 80 degrees. September is a slightly drier month than May, but September is closer to fall (a very planting friendly season), so it’s a draw between these two.

#7 - April - I know. I know. That is a month when nurseries are bursting with folks looking for things to plant. Well, there are two things to consider. One, those people aren’t well informed….just kidding, haha. One, many of those people are looking for annuals and perennials to plant and my list is for woody shrubs and trees. And two, April is just two and a half months removed from the summer season. I’m not saying this is a bad month to plant in; it is a good month to plant in, just not the best.

#6 - March - March is a very fine time to plant. With an average high temp of 66 degrees and the wettest month of the year, March is plant friendly. But there are even better months ahead!

#4 & #5 - December and January - I love planting in December and January. These months would be ranked higher if not for the disclaimer I need to provide for them. Disclaimer: I would "consider" excluding plants with a zone hardiness rating of 8 or higher (some examples would be oleander ,pittosporum, or some varieties of gardenia), because of their susceptibility to cold damage. Don't let the disclaimer scare you off, though. Put on your long johns, grab a shovel, and plant your sweet shrub and dogwood, knowing they are loving you for caring enough to find them a new permanent home at the right time of the year.


PHOTO: Sweet shrub (fragrant, deciduous flowering shrub)

#3 - October - Why isn’t October #1 or #2? Well, it gets edged out because it can still be rather warm in October and it’s typically a dry month (the driest on average of all the months, averaging just 3.23” of rain). Still, fall has just begun and you’ve got all of this great root growing season ahead of you (fall and spring are the seasons when roots grow the most), plus the mild Alabama winter and then spring greet us before the harsh summer whacks us upside the head. October is a winning month for planting, for sure.

#2 - February - This is a great time to plant. Root growth is occurring. Deciduous plants haven’t leafed out, yet, reducing the amount of transpiration (water loss), which can stress a plant out. Yes, February is a wonderful time of the year for getting in your hydrangeas, magnolias, and other such flora. If not for the fact that February is less than four months away from summer, it would probably be #1. But forget that! It’s a totally awesome month to dig in. Can you dig it?

Ta,,,ta,ta,ta,ta,ta,taaaaaa!
#1 - November - This is the best of all the months to plant in, with February and October following close behind. November features an average high temperature of 65 degrees and is in the top half of rain producing months. The root growth of the plants you are planting will be through the roof and you have plenty of time before mean ol’ summer arrives.


PHOTO: Grancy gray beard (small tree or large shrub)


If you notice, the three worst months to plant in are in the summer. Heat does not blend in well with planting shrubs and trees. It can be done, but as you see, there are better times of the year. I really don’t have a problem with any of the other nine months for planting, but some are just a little better or a little worse than the other. It’s Novermber, now, so if you’ve got a little snowball viburnum or Grancy gray beard that you’re think of planting, there couldn’t be a better time than now!

Friday, October 10, 2008

Transform a ho-hum bed into something more

Have you ever noticed how a flower bed can start to lose its appeal? Grass and weeds begin to creep in and take up residence with the plants. Some of the plants just aren't performing as well as they could. Oh, woe is the gardener that confronts such a situation with little time and even less money (the DOW was down again) to do something about it.

Recently, I encountered just such a situation at a very nice couple's home in Homewood. The bed on the back side of their home was divided into two or three sections. Some of the beds had loosely arranged rock borders, where the rock was basically sitting on top of the ground, and other beds had no rock border or delineation at all. Bermuda grass, the scurge of flower lovers, had found its way into much of the garden space, as well.
The recipe to upgrade this garden didn't take much time or expense.


The formula for this situation:
1. With a can of spray paint, I played around with some curved lines for the bed outline, letting some of the plants that were already planted dictate how far out from the brick the beds would extend.
2. Once the outline was determined, weeds and Bermuda grass were sprayed.
3. Using the stone that was already there and adding a little bit more (from my own personal pile!), the border was installed. Nothing fancy, here. Much of the stone was dug up over the last couple of years, right there on the property. Tip: When installing a stone border, try standing the stone on edge, buried a few inches and then tamped in, to get more mileage out of your resources.
4. After installing the border, a soil mix was added to the bed. A few plants were raised so not to be planted too deeply and ferns, hosta, peonies, and few other fun flora were divided and replanted (dividing plants, a great way to take up garden space).
5. Where appropriate, landscape fabric was installed to keep weed re-emergence to a minimum. And finally, mulch was applied.


To make this little project work, three things were essential.
1. A design that the client was happy with.
2. Proper installation techniques (in the case of this project, that would be plants and stone).
3. Maintenance (don't let weeds go unattended, mostly).
These three components are the keys to any successful landscape project. DESIGN, INSTALLATION and MAINTENANCE.

Monday, August 25, 2008

Conserving Water .... a couple of ideas.


UPDATE:
A few days ago I met with a very nice couple that I've done work for in the past. I thought it was really quite neat to see that their daughter had hand painted a rain barrel at the front corner of their home to help irrigate some plants in their back yard. I think she did a great job, don't you?


ORIGINAL POST:
Our cities grow and the demand for water increases. Many people love their plants. They are like friends to them. During the last few years, there have been instances where city governments have placed restrictions on outdoor watering. When outdoor watering is restricted, we are making it hard for our plant friends to be all they can be. One way to help is homemade water conservation.
Water Barrels - Connect to your roof gutters and direct year-round rainfall into these durable collection barrels. These barrels range in price from $60 - $150.

A link to "How to make your own water barrel:
http://www.bayteccontainers.com/howtomaraba.html
Here are a few more ideas that might help with water conservation:
You can do many things to capture rainfall at your site:
-Create depressions around trees and line them with rocks or mulch to retain moisture.
-If you are designing a new home site for water harvesting, arrange brick or flagstone paving to direct water to plants.
-Dig furrows and channels to direct water to a garden.
-Make sure your gutters and downspouts are free of trash, dirt and leaves.

Saturday, June 14, 2008

Five woody landscape plants to possibly avoid in your landscape

There are some woody landscape plants that enjoy popularity but probably should be given careful consideration to before planting them in your yard. My criteria for a plant making this list isn't so much about insect and disease vulnerability, although that may be part of it, but more about how attractive and reliable the plant is, long term, in your landscape. This is my opinion based on years of observation. It's certainly a subjective opinion and if you've got any of these plants in your yard and you love them....my apologies! My list of five are (in no particular order):
5. Any Japanese holly. Scientific name - Ilex crenata. Helleri holly and Compacta holly are two that are commonly sold in nurseries (there are many!) that I have seen more dead or dying than doing well. Be sure, when buying a small leaf holly that doesn't have thorns, to look and see what the scientific name is. If it begins with Ilex crenata, you're probably going to regret your purchase. I suspect that Japanese holly is simply a plant that requires excellent soil conditions coupled with a consistent watering regiment (something, especially given the periodic outdoor watering bans, that isn't likely to occur in most landscapes over the long haul), but numerous other problems, such as web blight, anthracnose and canker problems have been linked to Ilex crenata, as well. An excellent common landscape plant to use as a substitute for Helleri, Compacta, and other Japanese hollies is Dwarf youpon holly (Ilex vomitoria 'nana').
Ilex crenata 'Compacta'
(photo left)


Bradford Pear Damage (photo, right)


4. Bradford Pear. Makes the list based on two main factors. One, it is overused in the Southeast. Two, it is a very weak wooded tree and with age, becomes as brittle and breakable. I remember taking a woody plant course at Auburn, back in the 70's, and this tree was touted as having ornamental pluses for all four seasons of the year. The tree hadn't been used nearly as much in the landscape back then as it has been in the last two decades and some of the pitfalls of having a Bradford in your yard weren't as publicized back then. More recently, its use has declined quite a bit. In fact, in some new residential developments, it is banned from being planted.
Nandina domestica 'Firepower' (photo, left)


3. Dwarf Nandina 'Firepower'. I'm not including some of the neat prostrate hybrids out there, like Harbour Dwarf and Harbour Belle, of which I have planted many times. I'm talking about the old mop head dwarf Nandina. This is the original dwarf nandina or very similar to a plant I remember being sold as Nandina domestica 'nana'. It was a top seller at most nurseries during the 70's, 80's and in the 90's. This plant may be more deserving than to end up on my list, but I have seen enough plantings (especially those all too common linear plantings), to at the very least, brand them as being a little hard to swallow. The mop head shape of the plant and the curling under of the leaves with odd coloration that might resemble a chemical burn are unusual and I've noticed that, if conditions aren't just right, these plants can become quite scraggly, showing more wood than foliage. I'd say there are very few situations in the landscape where this plant would be considered perfect.

2. Leylend Cypress. Overused! Grows larger than anticipated for the space they are often times planted in. Many of these plants have been cut down from the corners of two story homes (because they outgrew the home) and replaced with more moderately growing landscape plants, like Mary Nell Holly, Ocala Anise, or some of the Hinoki cypress varieties that are available. Also, Leylend Cypress has a major blight problem that has resulted in lots of these plants displaying huge sections of dead foliage on them all throughout the South. Leyland was flying out of nurseries like mad just a few short years ago, but now it only takes a drive around town to see that something has got a hold of this once proud plant and it won't let go.


Leyland Cypress showing canker disease (photo, right)


American Boxwood in decline (photo, left)


1. American Boxwood. An icon amongst plants! A mainstay of the old Southern gardens! This plant makes my list because it is rare you see American Boxwood being all they can be. It is, after all, high maintenance. From the leaf minors to the Phytopthera root rot to the required meticulous pruning, American Boxwoods are almost behind the eight ball before the get out of the nursery. Now, if you are willing to do what it takes (keep the bugs and harmful fungus and bacteria away) and are aware that you will spend a good bit of time hand pruning this small leaf plant to ensure it's health, then you could be rewarded with a truly outstanding plant, but I'll just say, I haven't seen many old outstanding American Boxwoods in the Central Alabama area.

"American Boxwood: Once a mainstay of old Southern gardens" (photo, right)

Sunday, March 2, 2008

Pansy Tip

Here is my take on pansies here in Alabama.
We plant them in the fall or early winter because we know they like cool weather. Also, after the first freeze, there is no other annual that performs as well as pansies do.
It is now early March and there is no better time for your existing pansies to look their best. There are several reasons for this. One reason is that our lowest low temps aren't nearly as tough on pansies in March as they are in January/February. Every time we get down into the twenties or teens, pansies take a bit of a hit and take a little time to recover, even though they like cool weather. Teen temps won't typically kill a pansy plant, but you aren't going to see them going full steam ahead when it's that cold, either. Another big reason your existing pansy beds can do so well, right now, is because the root system is more developed because they've been growing for several months. Nice cool, but not cold, weather, coupled with a mature root system are setting your pansies up for success. To reap the benefits, you need to do three things to make it happen for you:
1. dead head your pansy plants (remove spent blooms)
2. fertilize with a plant food formulated for blooming annuals
3. make sure your pansies beds don't get too dry (water 2 x's a week inbetween rains)

The last month or so of pansy season can be a full color blast!

Tuesday, November 20, 2007

Deadheading your pansies

I know it may seem a little cruel; tricking the pansy plant into thinking it’s not proliferating the species. I do this by picking off the little seed head that form after the beautiful flower fades. The pansy does more of what it thinks it needs to do, because of my thievery, to create more pansy plants. It flowers like crazy. Now, other things also help, like having good soil to grow in and proper fertilization, but deadheading is, oh so important. The pansies I have in pots on my front steps…a day doesn’t go by without me picking off at least a few spent blooms. Maybe I’m obsessed, but I have lots of flowers!
How to: Just pinch off the spent pansy bloom at the base of the stem with your fingers or use pruning snips. You’ll become an expert at determining what is a seed head and what is a flower bud in no time.
By the way - at the end of the pansy season, as spring is coming into form, I allow the pansy to go to seed. I may even scatter a few in the garden to see what might come up later in the year.

Sunday, October 28, 2007

Pansy Planting Tips

Hey everyone,
Here are a few pansy planting tips for you. First of all, plant pansies when it is cool, like it is now in Central Alabama. Sometimes it gets cool in early September, but I don't let that fool me. I wait until at least October and then only if it's cool. The reason for this is because pansies thrive in cool weather and do not cope well with hot weather. The pansy plants will get leggy and stretched out when they don't get the coolness they desire.
Choosing a spot is also important (just don't plant pansies in too shady of a spot). Or, I should say, preparing a spot is important. You definitely want the soil you are placing these pansies in to be nice and loamy. Have you ever watched one of those clean cut landscapers on HGTV? You know...the guy that takes his shovel in his manicured hands and sinks it into lush, to die for, soil. That's how your soil should look. The pansies will love you for it. Now, I would caution you to not make the soil "too cushy" or your plants will dry out quicker than you like.
More on soil preparation since that is likely the most important aspect of this discussion. I prefer to fertilize my pansies when I plant them. Pansies are heavy feeders (like me!), so a nice little fertilizer application mixed into the soil before planting or sprinkled around each pansy after you've planted them, will do wonders. I would suggest using a dry, granular flower food that you can get in a 4 lb. tub or a small resealable bag at the big box stores. Most flower foods will have a higher middle number (Phosphorus) and that's a good thing! For pansies, I would not use Osmocote. It is a slow release fertilizer, but it releases it's goodies based on soil temp, mostly, and in the winter time, Osmocote or other 3 month fertilizers will not be as effective. After that initial feeding, do subsequent feedings using either the same fertilizer or a liquid fertilizer with a similar fertilizer analysis (the three numbers that tell you how much nitrogen, phosphorus, and potassium are in the fertilizer). Read the label for instructions, always!
Alrighty then...the next thing to remember is: 1. always slightly loosen the roots up just before planting them in the ground...slightly loosening them is the key,,,you don't want your pansies to look like a doggie chew toy after you're done loosening the roots. 2. don't plant your pansies too deeply. They should be planted a tiny bit high with the soil mounding up to the crown of the little root ball. If this sounds confusing, just plant the plants even with the surrounding soil. I will say this, though, a slightly raised planting bed is a great idea...sorry, that comment should have been under "preparing a spot". 3. Lastly, water your little pansy friend! Water him before you plant him and water him well after you've planted him. And keep watering as he grows for you.
OK,,,sorry, but that wasn't lasty....other random notes on pansies:
A. Bigger doesn't always mean better, especially when it comes to pansies. If I'm buying a flat of cell packs, for instance, I don't look for the biggest, tallest plants. I look for nice, compact, bushy plants and preferrably plants with flower buds swelling and ready to show a burst of color.
B. Dead head your pansies (this is where I am not so much like a pansy!). Take that spent bloom and pinch it right off...this practice will encourage more blooming.
C. And really lastly, enjoy your pansies. Smell them, look at them, and thank them for being so inspiring!