Showing posts with label bench seating. Show all posts

Friday, August 27, 2021

Flagstone patio, fire pit, steps and sitting wall, Emerald zoysia sod, and drainage. That's the not so condensed title of this post.


Here's a project I recently designed/installed in Vestavia Hills, AL -


This project objective was to create an additional outdoor space to the existing deck. The middle rail of the deck was removed to allow access to the flagstone patio area.


Elevation and drainage were given careful consideration while designing the project.


The sitting wall was installed so it could be backfilled creating a slight slope away from the patio.


This drainage basin with a heavy duty plastic grate was our fix for a substantial drainage problem. There are 2 four inch pvc pipes that handle the rain water depositing it 110 feet at the other end of the property.


The fire pit will be put to good use in the Fall and Winter months.


My brother, John, helped me with this project which included installing six pallets of Emerald zoysia sod.


90 percent of this patio was installed using a buff polymer sand. Method: The original dirt was hand tamped. Then #57 gravel was installed follow by a 1 to 2 inch layer of #8910 gravel. We followed the addition of the gravels by tamping with a plate compactor. Finally, a thin layer of sand was added which assisted in leveling the flagstone.The polymer sand was used as a substitute for a mortar grout. The product set up great.


Here are the before pictures!


Saturday, September 3, 2016

Bang for your Buck...Rip Rap Stone Bench

Stone benches like the one I completed a few days ago can cost a pretty penny when you add together the cost of the stone, cement, rebar, mortar/sand and the labor. This bench was 8' long by 12"+ deep by 17" tall,,,fairly substantial, and it didn't break the bank. I used rip rap (a limestone product quarried here in Alabama and typically used for drainage applications) for the majority of the bench. Concrete pavers (2 or 3 dollars a piece) were used for the coping (sitting surface) as another a way to achieve a desired affect for a fraction of the cost. It's not a bad way to go if you are sticking to a budget.

                                                              *click on pic for closer inspection!

Thursday, August 6, 2015

Flagstone Patio, Sitting Wall, and yes, a Fire Pit....in July!!!

I completed this project, last month, for my animal loving client. It was a large (350+ sq. ft.) flagstone patio using Alabama quarried brown stone. There was also a 12' long sitting wall using brown stack stone with a flagstone coping. I inserted three large stones into the sitting wall that my client's son brought in which gave the project some extra character. Finally, a "largish" fire pit was installed for those cool Alabama Summer nights!

Wednesday, November 20, 2013

Hodge Podge Stone Bench

Have you got a few cinder blocks or old bricks out back behind the shed? Been collecting some stones from the side of the road? Willing to do a little wheeling and dealing with your local nurseryman for the small pile of 10 or 15 pieces of flagstone? Maybe pick up 3 or 4 bags of mortar mix after you next stop at Home Depot or Lowe's? Hey, you've just put together a neat little sidewalk bench!
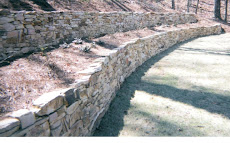
plants in photo: (left) ivy in container, (right) rosemary

Monday, October 31, 2011

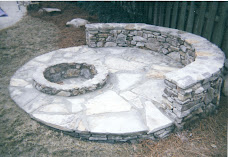
A Place to Hang : Brown stack stone wall with firepit, stone benches, and crushed ore patio.

The longer I'm in the business of landscaping, the more I'm finding homeowners that are interested in creating outdoor living spaces for family and friend to enjoy. Often times, this includes the incorporation of stone into the landscape.
My most recent project took me to a home in Birmingham, Alabama. The challange was to build a wall and patio area that turned what was a sloping wooded hillside into a space large enough to use for entertaining large gatherings, but small enough for intimate get togethers. The inclusion of a fire pit made this "outdoor room" suitable for the fall and winter, as well.
To achieve a natural look, brown stone was used for the wall and fire pit. The patio area surface is crushed red rock. The brown stone benches were delivered to the site from a local quarry. It was important that warm, curved lines were used in the design of the different components to give the project an "organic" or "old world" appeal.
 
Posted by Picasa
(click on images for closer inspection)

Sunday, October 17, 2010

A Foundation Planting that is Mindful of Erosion, Allergies, and Spacing


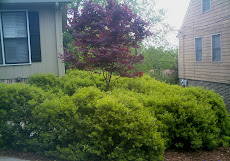
My most recent landscape excursion involved the installation of a front foundation planting in Hoover, AL. The home owners brought up a few concerns as we began talking about their landscape. For one, they had been battling some erosion issues at the sloping end of their home by the drive way. Also, there being issues with allergies in the family, plants for the landscape needed to be chosen to address those needs. Finally, the homeowners talked about wanting a landscape that wouldn’t become overwhelming for them. I was excited that they were aware that spacing plants too closely, while looking great initially, would eventually bring on pruning headaches and make the landscape seem like one giant hedge rather than a thoughtful gathering of distinguishable plants.

PHOTO LEFT: Son, Jake, helps his dad with stone wall installation.

A brown stone wall was installed to negate the sloping portion of the front foundation. The wall, about 4’ tall at the drive, flows into what becomes a stone border for the entire foundation planting. The wall and stone border follows lines that are curved to help include a couple of small trees and some plant depth within the planting area. Also, a small stone bench is placed on the level side of the foundation for interest and also to add a little extra “weight” to help counter the stone wall on the sloping side of the house.


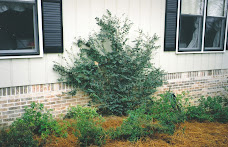
Choosing plants that are relatively allergy free required a bit of research. I was aware that plants with leaves that are heavily pubescent would be more prone to trigger an allergic reaction, so that was my starting point as I developed a plant list. I also used the book, “Allergy-Free Gardening”, by Thomas Leo Ogren. Mr. Ogren uses a 1 to 10 rating system to classify a plant’s allergy potential. Every plant used in this landscape was rated 1 (best) to 5, with most being rated 3 or better. The plant list:
(from left to right as you look at the house from the street)
1. Variegated Pittosporum
2. Bloodgood Japanese maple
3. Autumn fern
4. Shi-Shi Gashira Camellia
5. Harbor Dwarf Nandina
6. Snow Indian Hawthorne
7. George Tabor Azalea
8. Tonto Crape Myrtle
9. Sherwood Abelia
10. Pansies (probably Begonias in the Spring)


Spacing of the plants in this landscape was generous. Aside from avoiding a crowded landscape in the future, a well spaced landscape also encourages good air circulation between plants which is very helpful in promoting good plant health. Another feature of this landscape was the installation of landscape cloth. Landscape cloth is similar to landscape fabric, but better. No cloth or fabric is 100 percent effective, but it can typically cut down on about 95%, or more, of your weed problems during the first 5+ years of the life of a landscape and that is when you really need that kind of weed control.

It was enjoyable working on this project...The weather was great, all aspects of the job were fun, and working for the home owners was really a pleasure.

Saturday, January 30, 2010

The little pump that could.

I recently got a call from a lady I had built a water feature for about 8 years ago. She was concerned over a noise coming from her pump. At one point I asked her how old this pump was. She told me that it was the original. Wow! Most pond pumps have a lifetime of around 3 years, so this was definitely a rarity. She told me, during our phone conversation, that she had unplugged the pump, which is what I would have advised her to do.

Today, I went by to check on things. Upon plugging the pump back in, the noise was gone and this eight year old pump had new life. Admittedly, the pump could stop tomorrow and it would be five years over due, but this is quite amazing.

On with the project! The home here has a small back yard. The view from the rear of the home looks right out onto the water feature, where there are also some tasteful plantings. The water feature includes a 4' x 6' main pool with a water course that is about 2.5' tall. The flagstone coping around the main pool gives the project a sort of old world, yet elegant appeal; and the water recalls the peacefulness of nature. Beyond the pond, some small, curved flagstone landings and small stepping stones help to create a cohesiveness with the rest of the yard.


If this video is not available, try this link.

Note: I installed the project, but was the recipient of a very thoughtful design by a very nice lady that lives in the area.

Sunday, May 3, 2009

Stone in the yard

A couple of months back, I spent several weeks working for some nice folks in Vestavia. They were having a very large deck built off the back of their home and they didn't want many rails on the deck to obscure their view of the yard. In order to comply with code (a deck without railing must be within so many inches of the ground), a lot of dirt had to be brought in, but in an eye pleasing way. That's where I came in. Building a stack stone retaining wall and incorporating some large stepping stones, I was able to make the deck "legit" and find a home for some of my favorite plants, like Helaborus, Daphne odora, Aspidistra, and Osmanthus. I ended up spending a little time in other parts of the yard, as well. The video, below, focuses on the stone work.

Wednesday, August 6, 2008

Circular patio with fire pit and sitting wall

Me and my trusty pick-up found our way to Trussville, recently. I met a very nice family there that was interested in having a round patio with a firepit and sitting wall. They explained to me that the round shape of a patio would contribute a calming effect to those who used it. I have to admit, I do feel a calm pass over me when I sit on that patio, now that it is completed. The line of a circle is so simple, yet beautiful, you know. It's no wonder it can bring about serenity and convergence.

VIDEO: Circle Patio

Tuesday, July 8, 2008

New Photos from Judy

The use of garden art, containers and well placed perennials
is a good way to soften stone work.(Click on the picture for a closer look)

About a couple or so years ago, I met Judy and Johnny about doing some work at the home they were building in Shelby county. I ended up building a wall around their parking pad area (actually, the wall came first) along with steps and a flagstone walkway. I also dug up some of Judy's plants from the home she previously lived in for her to plant at her new home. It wasn't long before I became keenly aware that Judy had a wonderful touch with plants...she's quite knowledgeable and has a great eye!

Judy was nice enough to send me some updated pictures of the work I did at their home along with all the landscaping she has done herself to make it all look so much nicer than it did those two years ago when I mortared in the first stones. I'm thrilled to see how she's made the whole area really flow. I hope you enjoy the pics and here is a link to see what it looked liked before Judy's eye took over - http://themanfromearth.blogspot.com/2008/01/stone-and-brick-can-work-together.html


A long, pretty drive leads up to Judy and Johnny's home.
This is the view from below the parking pad where I believe
I see some hosta, maidenhair fern, holly fern, nine bark and
several other interesting plants to go along with some nice
raised stone beds she installed herself (I'm sure with Johnny's
help, when he wasn't fishing)

Thursday, January 3, 2008

Stone Bench


I've climbed many a rock pile at nurseries, in Oneonta, etc. and have always noticed and pulled out interesting stone that caught my eye. Lots of times, I'll notice big, 2" thick slabs that look perfect for bench seats. I've started to do some of these benches as part of my job projects.
The formula - Pour a footing for the pedistals. Mortar the pedistals using smaller stone. At the top of the pedistals, add an acrylic adhesive to the mortar and place the slab, level.
These benches fit in well in an informal garden setting, along a pathway, etc.

Sunday, December 9, 2007

Let's Go Play in the Garden!

I did some hardscaping (stone steps, patio, pond and walls) this past spring for a couple that lives in Homewood. It was an exciting job for me and I was fortunate to be allowed to do some more work and help finish off the backyard landscaping this winter. Part of the enjoyment I've recieved working on this job has been the thoroughly engaging personality of this couple's son, Kyle. Kyle, age 5, has always seemed interested in what was going on in his backyard, asking questions and making suggestions. I love it! In fact, I sometimes feel like it's good to have a playful, childlike eye when deciding how a landscape might come together and maybe that's why I've enjoyed Kyle taking an interest in the landscape, so much. Well, a huge smile came over my face when I drove up to the job site and noticed that Kyle had placed hand written signs, in crayon, all over the garden. He had given each area of the yard a delightful name and I just had to share a few pictures with you. Sorry about the fuzzy photos...they don't do Kyle's art work justice.

PHOTO #1 - Stone steps leading to the garden
 

Posted by Picasa

PHOTO #2 - Kyle's first sign, signifying the beginning of the garden
 
Posted by Picasa

PHOTO #3 - Kyle has a sign on this red twig Japanese maple called, "Maple Garden"
 
Posted by Picasa

PHOTO #4 - The sign attached to the stone, pointing toward the pond: "Titanic Garden"
 
Posted by Picasa

PHOTO #5 - This is Kyle's favorite part of the garden...He calls it, "Garden Garden"
 
Posted by Picasa

Sunday, December 2, 2007

More than just a wall


Posted by Picasa

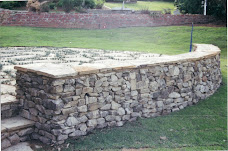
This wall that I constructed in 2006 was built to provide some sense of enclosure when spending time on the patio. The wall was built wide (approx. 15") to look proportionate to the size of the patio and also to provide a seating surface. The coping material on the wall is 1" to 1.5" brown flagstone. I used moss rock for the main wall.