|
Showing posts with label stone work. Show all posts
Showing posts with label stone work. Show all posts
Tuesday, October 5, 2021

Friday, August 27, 2021
Flagstone patio, fire pit, steps and sitting wall, Emerald zoysia sod, and drainage. That's the not so condensed title of this post.
Here's a project I recently designed/installed in Vestavia Hills, AL -

This project objective was to create an additional outdoor space to the existing deck. The middle rail of the deck was removed to allow access to the flagstone patio area.

Elevation and drainage were given careful consideration while designing the project.

The sitting wall was installed so it could be backfilled creating a slight slope away from the patio.

This drainage basin with a heavy duty plastic grate was our fix for a substantial drainage problem. There are 2 four inch pvc pipes that handle the rain water depositing it 110 feet at the other end of the property.

The fire pit will be put to good use in the Fall and Winter months.

My brother, John, helped me with this project which included installing six pallets of Emerald zoysia sod.

90 percent of this patio was installed using a buff polymer sand. Method: The original dirt was hand tamped. Then #57 gravel was installed follow by a 1 to 2 inch layer of #8910 gravel. We followed the addition of the gravels by tamping with a plate compactor. Finally, a thin layer of sand was added which assisted in leveling the flagstone.The polymer sand was used as a substitute for a mortar grout. The product set up great.


Here are the before pictures!
Saturday, April 22, 2017
Flagstone Stepping Stones
A few random pieces of flagstone can make a nice stepping stone path through your lawn. Situate your flagstone to that the top is just above the soil line and lower than the level where a mower might make contact. Twist and turn the stones into a pattern that doesn't seem too regimented and make the distance between the stone comfortable for folks to walk across.
And, as so often is the case, it is what you don't see that makes what you do see look good or not so good. The base soil beneath these flagstone pieces should be excavated deeply enough so that the soil can be tamped and then leveled with a paver base gravel or sand that the flagstone will actually sit on. Also, be sure your flagstone pieces are not too thin. I prefer at least 1" thick flagstone and if the pieces I'm using are particularly large, I'll try to select pieces that are 1.5"+ thick. Some of the larger flagstone pieces in this photo are close to 3.5' x 2.5' (wide x long).

Photo: Step stones I installed about 1 year ago.
Tuesday, December 6, 2016
What's a landscaper to do during water restrictions and severe drought?
Hardscaping!


Well, the 3 month drought finally ended a few days ago while I was finishing up this job in Helena, AL. There were water restrictions in some places and the ground had become really hard, so the rain was exciting. Up until this week, no one has been interested in planting anything this fall. This job was a drought stricken-ed landscaper's dream....stone work!
Job - Steps, walls, grading work, prep for Spring sod work.
Wednesday, October 26, 2016
Secure Mail
A very nice couple in Pelham called me and asked me over to take a look at their situation. It seems that in the middle of the night a "not so cautious traveler" swerved into their mailbox which was mounted onto a fairly heavy duty metal pole. Both the pole and the mailbox were crushed.
This new stone mailbox was fun for me because I needed to try to match the stonework on the home to the mailbox. Also, I built a couple of planters
 to match the mailbox. My homeowners intend to plant mums in the coming days. Hopefully, I can swing around and take a picture or two of the mailbox dressed up.
Please feel free to click on the picture for closer inspection!
Saturday, September 3, 2016
Bang for your Buck...Rip Rap Stone Bench
Stone benches like the one I completed a few days ago can cost a pretty penny when you add together the cost of the stone, cement, rebar, mortar/sand and the labor. This bench was 8' long by 12"+ deep by 17" tall,,,fairly substantial, and it didn't break the bank. I used rip rap (a limestone product quarried here in Alabama and typically used for drainage applications) for the majority of the bench. Concrete pavers (2 or 3 dollars a piece) were used for the coping (sitting surface) as another a way to achieve a desired affect for a fraction of the cost. It's not a bad way to go if you are sticking to a budget.

Wednesday, August 10, 2016
SNAP! Transforming a Mulch Path into a Solid Stone Path


Large (and heavy) snapped slabs of brown stone, quarried near Oneonta, AL, is what I used to form my step treads for this converted mulch to stone path on Lake Martin, near Alexander City, AL. Each slab was about 40" by 14" by 3" to 4" thick, giving the overall look of the project a "solid" appeal. I decided to make the riser heights just under 6" and that made traversing the incline easy and gave the project the look I was after. In between each snap stone step are lengths of Alabama brown flagstone walkway...the width is a consistent 40", same as the step treads. Beige mortar was used in the mortar joints for continuity. Finally, moss rock was the stone of choice for what remained of the risers. The use of darker moss rock was a subtle attempt to break up the shades of brown in the step treads and flagstone.

Note: What you don't see is the hand excavation, the relentless tamping, and the ample amounts of gravel, concrete and rebar that was used under the ornamental stone to make this pathway reliable. Also, there was plenty of consideration given to where steps were placed and how to incorporate the curves and gradations along the length of the pathway.
Additional Note: It is quite interesting to watch large stone being snapped at the quarry. A large piece of stone (for instance, it could be say... 4' by 7' by 4" thick) is placed on a table with heavy duty rollers and the size being ordered is marked off. Then the stone is placed under hydraulic splitters where they are slowly lowered until the slab is broken off at the desired dimensions. It's a much better look, for certain applications, than cut stone.
Tuesday, April 5, 2016
Stack medium moss rock entrance planters w/ Ruby Slippers hydrangea
Just South of Birmingham in a quiet neighborhood just off hwy. 280, I met a very nice couple that was interested in updating the entrance to their property by incorporating stone and some new plantings. The area in question was not draining very well so it was deemed important to create a raised environment for the Ruby Slippers hydrangea and Georgia Blue Veronica we'd be installing for the project. Here are some before and afters. I'm hoping to get some additional pictures when the hydrangeas leaf out and bloom.


Tuesday, November 24, 2015
Flagstone Patio Install Using Polymer Sand
Here's a little 10' patio I'm currently working on. The job is nearly complete except that the very last thing to do, applying the actual sand, needs to be done when temps are above 60 degrees for a few hours. I hope to finish the job, tomorrow.

Thursday, August 6, 2015
Flagstone Patio, Sitting Wall, and yes, a Fire Pit....in July!!!

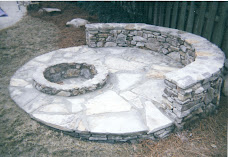
 I completed this project, last month, for my animal loving client. It was a large (350+ sq. ft.) flagstone patio using Alabama quarried brown stone. There was also a 12' long sitting wall using brown stack stone with a flagstone coping. I inserted three large stones into the sitting wall that my client's son brought in which gave the project some extra character. Finally, a "largish" fire pit was installed for those cool Alabama Summer nights!


Tuesday, March 3, 2015
Front stoop transformation...
I took an ol' front porch stoop made of pine decking and rails and converted into a stone stoop with a flagstone surface and some nice wrought iron railing. Job number one was to demolish the existing wood deck and steps.


Tuesday, February 3, 2015
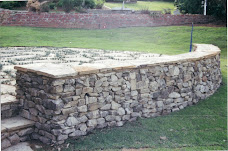
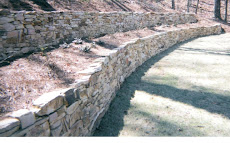
Small walls have their place.


Friday, January 24, 2014


Wednesday, November 20, 2013
Hodge Podge Stone Bench
Have you got a few cinder blocks or old bricks out back behind the shed? Been collecting some stones from the side of the road? Willing to do a little wheeling and dealing with your local nurseryman for the small pile of 10 or 15 pieces of flagstone? Maybe pick up 3 or 4 bags of mortar mix after you next stop at Home Depot or Lowe's? Hey, you've just put together a neat little sidewalk bench!

Tuesday, November 19, 2013
Outdoor Fireplace Using Veneer Cast Stone


Subscribe to:
Posts (Atom)