|
Showing posts with label patios and walkways. Show all posts
Showing posts with label patios and walkways. Show all posts
Tuesday, October 5, 2021

Friday, August 27, 2021
Flagstone patio, fire pit, steps and sitting wall, Emerald zoysia sod, and drainage. That's the not so condensed title of this post.
Here's a project I recently designed/installed in Vestavia Hills, AL -

This project objective was to create an additional outdoor space to the existing deck. The middle rail of the deck was removed to allow access to the flagstone patio area.

Elevation and drainage were given careful consideration while designing the project.

The sitting wall was installed so it could be backfilled creating a slight slope away from the patio.

This drainage basin with a heavy duty plastic grate was our fix for a substantial drainage problem. There are 2 four inch pvc pipes that handle the rain water depositing it 110 feet at the other end of the property.

The fire pit will be put to good use in the Fall and Winter months.

My brother, John, helped me with this project which included installing six pallets of Emerald zoysia sod.

90 percent of this patio was installed using a buff polymer sand. Method: The original dirt was hand tamped. Then #57 gravel was installed follow by a 1 to 2 inch layer of #8910 gravel. We followed the addition of the gravels by tamping with a plate compactor. Finally, a thin layer of sand was added which assisted in leveling the flagstone.The polymer sand was used as a substitute for a mortar grout. The product set up great.


Here are the before pictures!
Wednesday, August 10, 2016
SNAP! Transforming a Mulch Path into a Solid Stone Path


Large (and heavy) snapped slabs of brown stone, quarried near Oneonta, AL, is what I used to form my step treads for this converted mulch to stone path on Lake Martin, near Alexander City, AL. Each slab was about 40" by 14" by 3" to 4" thick, giving the overall look of the project a "solid" appeal. I decided to make the riser heights just under 6" and that made traversing the incline easy and gave the project the look I was after. In between each snap stone step are lengths of Alabama brown flagstone walkway...the width is a consistent 40", same as the step treads. Beige mortar was used in the mortar joints for continuity. Finally, moss rock was the stone of choice for what remained of the risers. The use of darker moss rock was a subtle attempt to break up the shades of brown in the step treads and flagstone.

Note: What you don't see is the hand excavation, the relentless tamping, and the ample amounts of gravel, concrete and rebar that was used under the ornamental stone to make this pathway reliable. Also, there was plenty of consideration given to where steps were placed and how to incorporate the curves and gradations along the length of the pathway.
Additional Note: It is quite interesting to watch large stone being snapped at the quarry. A large piece of stone (for instance, it could be say... 4' by 7' by 4" thick) is placed on a table with heavy duty rollers and the size being ordered is marked off. Then the stone is placed under hydraulic splitters where they are slowly lowered until the slab is broken off at the desired dimensions. It's a much better look, for certain applications, than cut stone.
Tuesday, November 24, 2015
Flagstone Patio Install Using Polymer Sand
Here's a little 10' patio I'm currently working on. The job is nearly complete except that the very last thing to do, applying the actual sand, needs to be done when temps are above 60 degrees for a few hours. I hope to finish the job, tomorrow.

Thursday, August 6, 2015
Flagstone Patio, Sitting Wall, and yes, a Fire Pit....in July!!!

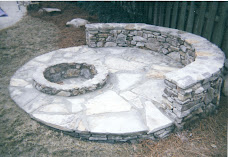
 I completed this project, last month, for my animal loving client. It was a large (350+ sq. ft.) flagstone patio using Alabama quarried brown stone. There was also a 12' long sitting wall using brown stack stone with a flagstone coping. I inserted three large stones into the sitting wall that my client's son brought in which gave the project some extra character. Finally, a "largish" fire pit was installed for those cool Alabama Summer nights!


Tuesday, March 3, 2015
Front stoop transformation...
I took an ol' front porch stoop made of pine decking and rails and converted into a stone stoop with a flagstone surface and some nice wrought iron railing. Job number one was to demolish the existing wood deck and steps.


Monday, October 31, 2011
A Place to Hang : Brown stack stone wall with firepit, stone benches, and crushed ore patio.


Tuesday, June 7, 2011
Sometimes Stepping Stones Won't Do

The space between the parking area and the back yard of this Vestavia home is well traveled by adults, children and grand children,,,and me. For years, I had done work in this yard, often inadvertently pushing around the stepping stones that were sitting in the underlying muddy terrain. Then one day it dawned on me. These folks need a solid, mortared walkway! Now, they're happy, their children and grand children are happy, and, I'm happy. Yeah!
Friday, July 16, 2010
Fire on the Water: Fire Pit, Flagstone Patio and Sitting Wall on Lake Martin

A recent project sent me out near Pell City, Alabama, at the vacation home of some nice folks on Lake Martin. These snapshots were taken the day I finished the job. I'll add updates when some landscaping is done and a few pieces of furniture are added to the patio. Large patios, especially, benefit greatly with the addition of furniture, plantings, etc. 
I sure can imagine enjoying a nice, late fall evening, while sitting on a cushy lounge chair, sipping a favorite beverage, feeling the warmth of the fire and the coolness of the air as lake ripples sound off a relaxing melody! 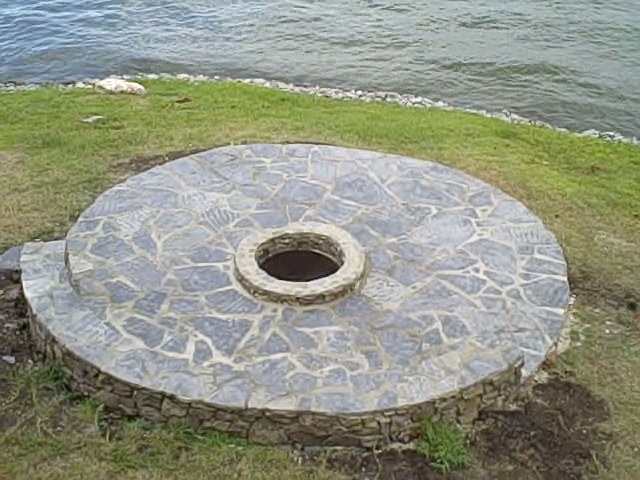
Thursday, July 15, 2010
Intimate gathering place: Fire Pit, seating area, small flagstone patio
Sometimes you don't need to go large. You lack space or having a huge area doesn't create the cozy feeling you desire? What better way to create a warm space than to install a fire pit? I completed this project about 4 or 5 years ago. One thing about a well-built stone feature...it's there for a long, long time...that's potentially a lot of nice evening fires! 
Monday, April 12, 2010

Friday, September 25, 2009
Brown Flagstone Garden Walkway
I installed this walkway, along with a helper, using existing and purchased brown flagstone. Previous to this walkway installation, there was a pathway using loose flagstone (not mortared), set in sand. Much of the sand ended up on top of the flagstone and the stones, especially the small ones, were unstable. The new walkway took on the same shape as the old one, but mortared using traditional methods (tamped gravel base, mortar bed, pitched flagstone with a buff grout). Much attention was paid to drainage and, also, the grout color was customized for the most pleasant interaction between stone and mortar. Thanks for tuning in!!!
Sunday, May 3, 2009
Stone in the yard
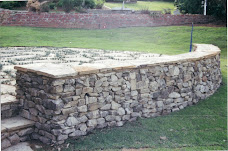
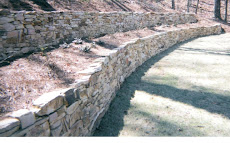
A couple of months back, I spent several weeks working for some nice folks in Vestavia. They were having a very large deck built off the back of their home and they didn't want many rails on the deck to obscure their view of the yard. In order to comply with code (a deck without railing must be within so many inches of the ground), a lot of dirt had to be brought in, but in an eye pleasing way. That's where I came in. Building a stack stone retaining wall and incorporating some large stepping stones, I was able to make the deck "legit" and find a home for some of my favorite plants, like Helaborus, Daphne odora, Aspidistra, and Osmanthus. I ended up spending a little time in other parts of the yard, as well. The video, below, focuses on the stone work.
Monday, February 9, 2009
Big Stepping Stones
Stepping stones are such a fixture in many landscapes. Here's a few tips to make them work and actually add to the beauty of your little corner of the world.
1. Pick the right size stepping stone, be it real stone or man made. Consider going a little larger than you actually need, as you'll often lose some of your stepping surface if grass, soil or mulch cover some of the stone.
2. Take your time on the installation, being sure to bury the stone at a depth where water will not collect on the surface of the stone and so that a mower can roll easily across the stone if it is place in a turf situation. Also, be careful to set the stone so it doesn’t rock on you when you step on it. This is another reason to use a larger stone, as large stones are less likely to move around on you.
3. Pick out pretty stones for your project. Look at your surroundings and try to imagine how your stepping stones will blend with the rest of your yard. These stones will be around for a long time to come.
PHOTOS: I designed the layout and installed these stepping stones about three years ago in Birmingham, AL.
Thursday, December 11, 2008
Parking Pad/Pathway Job Walk Through
The last couple of weeks or so, in between rain and cold (for Alabama), I've been in Homewood working on the installation of a parking pad, flagstone walk, and a stepping stone path.
The objective, initially was to find a spot for a car new to the family. Yes, a teenage driver (insert Bates Motel music)!!!
We decided to surface the pad with an 8910 gravel which was chosen because of the particular quarry it came from. This gravel has a slightly tan color and is not as stark as the typical gravel you buy from suppliers. Also, using 8910 gravel, which will pack down and offer an excellent surface for parking, is economical, and at the same time, attractive and functional.
The parking pad was bordered, on the lawn side, with a stone soldier course. Those stone, most of which are exposed 3 inches above the grass line, have nine plus inches buried and surrounded with cement and mortar. Careful attention was used in selecting the soldier course stone so that, one, the colors matched with the walkway, and two, that the length and thickness of the stone fell in place with the over all scale of the entire project.
The flagstone walkway was installed using a combination of stepping stones that were previously used for traffic from the drive to the front door and from stones the homeowner had left over from previous work on the house. Using the two different types of stone actually made for an interesting combination that worked well together.
The stepping stone path was chosen to provide access from the pad to the front door. As usual, I tried to steer away from straight lines, trying to make the pathway seem more "organic".  PHOTO: Crimson Queen Japanese maple
Finally, a planting bed was created at the head of the parking pad to help direct foot traffic and help soften the over all project. The homeowner has already bought a 'Crimson Queen' Japanese Maple to plant in the bed. It should really enhance the entire job.p
Thursday, September 25, 2008
Consider your hardscaping before going soft.

When ever I talk to a client about a landscape project, one of the first things I mention (if the client hasn't) is, "will there be a need for hardscaping?". My definition of hardscaping is any non-movable element in the garden. Of course, plants and turf grow, so they are considered softscaping.
PHOTO RIGHT: Pondless waterfall
Hardscaping would include walls, walkways, ponds, bird baths, driveways, garden art, steps, etc. The reason I ask about hardscaping is because it's always a good idea to do that phase of the landscaping first to make the entire project go more smoothly.
PHOTO RIGHT: Wall with waterfall incorporated.
These photos and video are of a project I've been working on. I'm done with the major hardscaping and have done very little softscaping, so the results look a little unfinished until I get some fall plantings, possibly a few well placed mini-boulders, and a stone bench installed.
PHOTO BELOW: Stepping stones are considered hardscaping.
ABOVE: Video of pondless waterfall.
Subscribe to:
Posts (Atom)